Tuesday, 24 November 2020
  6 Replies
  1.1K Visits
0
Votes
Undo
  Subscribe
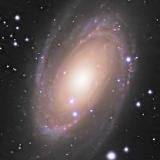
Captured 18th Nov 2020.  60x10s lights, 120 flats, 30s darks, no bias frames.
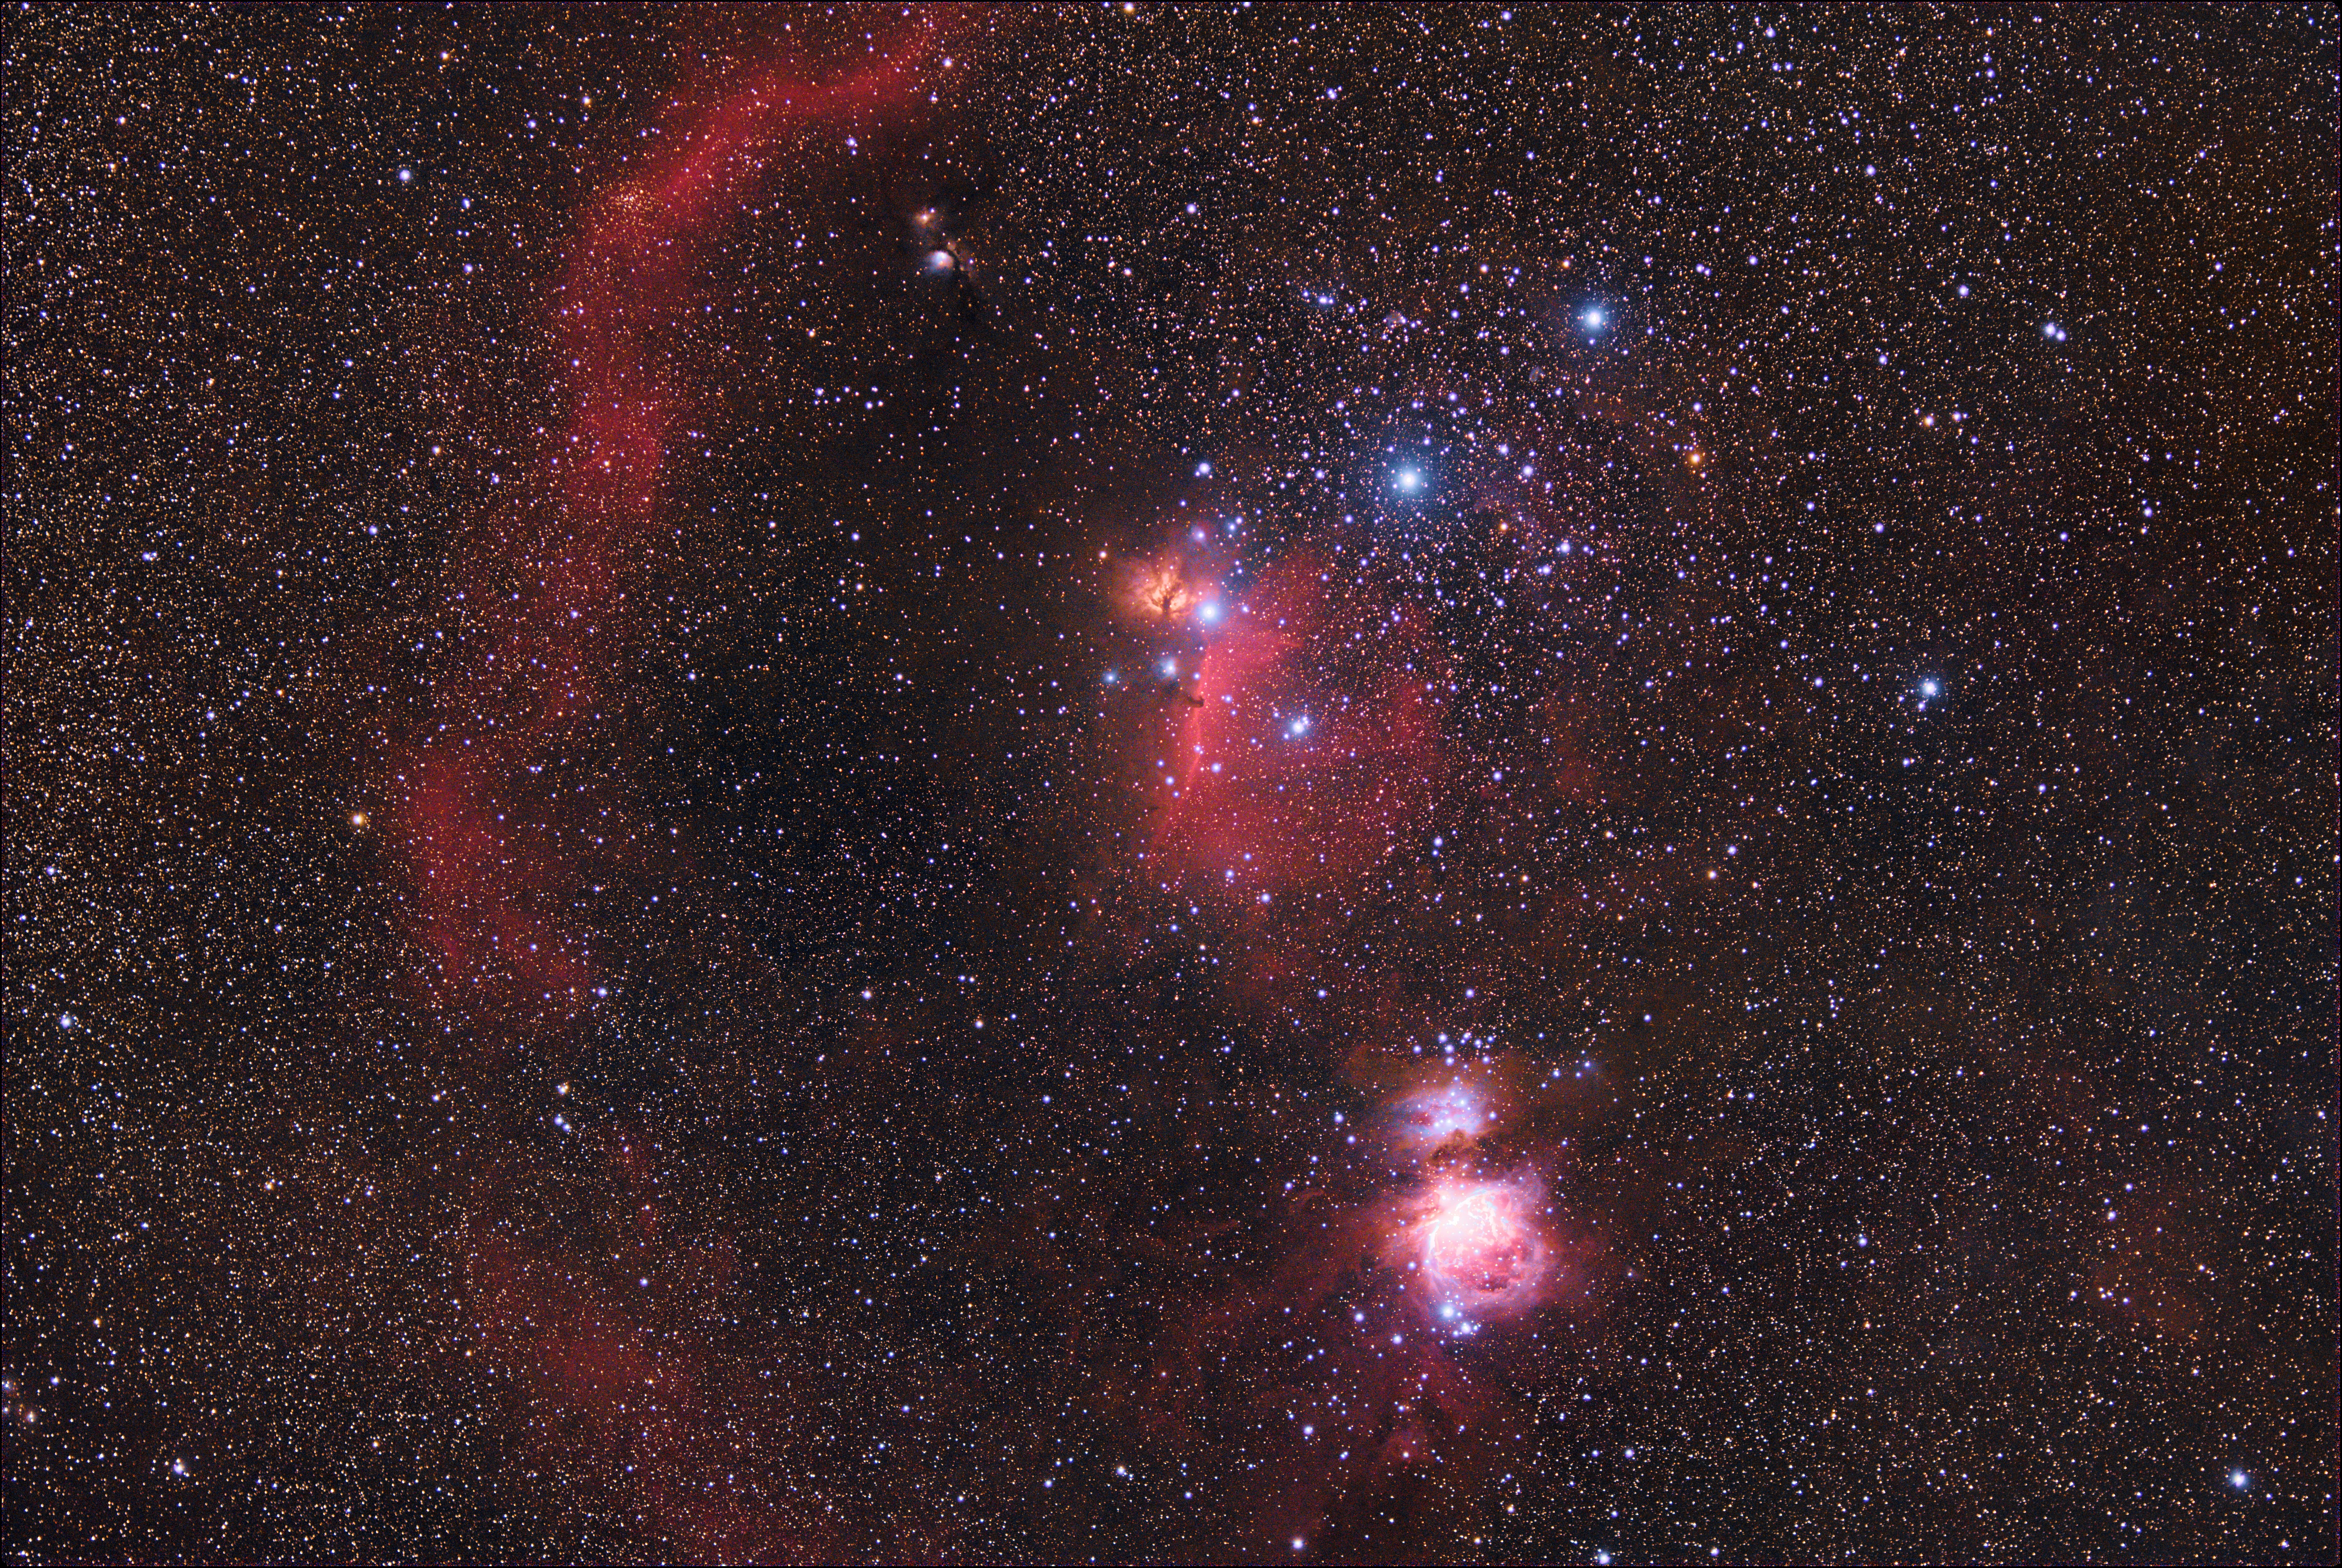
  • Astro Pixel Processor for calibration, normalisation, integration; remove light pollution, calibrate background, calibrate star colours; contrast, saturation, highlights.[/*]
  • Siril for green noise removal.[/*]
  • GIMP adjust black level and increase saturation in Red channel.[/*]
  • Final image is uncropped.[/*]
I have included the original stack from APP.  Happy enough with a 10 minute integration with this camera/lens against this object.

Dave

Orion-10s-lpc-cbg-csc-St-scnr.jpg


Orion-10s-stack-showing-light-gradient.JPG
3 years ago
·
#2139
0
Votes
Undo
Great work, Dave! It's just amazing what can be done in 10 minutes on Pier 4.

Brian
3 years ago
·
#2140
0
Votes
Undo
Thanks Brian.   Below Is the APP Light Pollution Removal in action.

Dave

LP-removal.JPG
Attachments (1)
0
Votes
Undo
Hello Dave, 

This is not just an excellent image but as Brian mentioned a testament to the lens and camera on that pier. Lots of detail and nice colours. That was a good idea to show us, as often you do the stacked image, as it really demonstrates what can be achieved these days. Amazing transformation and encouragement to anyone starting out and finds themselves disappointed by what they see  after stacking their first few images. It will take time to gain the experience to achieve something similar, but one can revisit everything one's done later. 

You used an amazing number of flats which led me to wonder if they were really being effective in terms of vignetting. From personal experience of making flat frames getting them right came down to a bit of trial and error with exposure times on each filter. Just wondering. 

Thanks for posting this for us to enjoy, not seeing many people doing it these days unfortunately. 

Cheers, 

Ray 

Ray
Roboscopes Guinea Pig


0
Votes
Undo
Hello again Dave, 

While posting my last comment you added an example of light pollution removal using APP. Now I'm assuming that this is the equivalent of DBE, Dynamic Background Extraction, in pixinsight. With a similar image with gradients I sometimes have great difficulty using DBE, so, maybe after stacking in pixinsight with which I'm happy with, I could then use APP to deal with anything like that where pixinsight is not so easy to use. I've not downloaded APP yet for a trial period, until I'm a bit clearer as to where it would benefit me. This is another example you've shared so maybe now is the time. I wouldn't abandon pixinsight but use the best options in each. My only reluctance so far is down to needing to invest time in using it. When you're my age you'll understand. 

Cheers, 

Ray 

Ray
Roboscopes Guinea Pig


3 years ago
·
#2143
0
Votes
Undo
Great image, and well done to you.


Simon
3 years ago
·
#2144
0
Votes
Undo
Thanks for the comments Brian, Ray, Simon.

Ray

You mentioned the flats.  There are 120 available as part of the calibration set.  These have a mean ADU (from FITS Liberator) varying from 27,000 up to 40,000.  I elected to use all the flats to average out the variance.  It seems to have worked ok.  When making my own flats using a luminescent panel I tend to aim for a mean of around 30,000.

Yes I think Pixinsight's DBE and APP's 'Remove Light Pollution' (which includes 'Calibrate Background') perform the same function.   It took a while to learn how to use effectively, the key being to use small rectangles and avoid placing them on the object(s) in the image.  Of course each image has to be treated on its merits.  These were my processing steps after the stack had been produced:
  • Export the stack from APP as a 32-bit float TIFF[/*]
  • Use Green Noise Removal in Siril, a high value one mouse click operation.  Save as 32-bit TIFF. I haven't come to terms with this yet in APP.[/*]
  • Reload into APP.[/*]
  • Remove Light Pollution[/*]
  • Calibrate Star Colours  [/*]
  • Digital Development Process[/*]
  • Saturation, Contrast, Highlights, Sharpen.[/*]
  • Save as 32-bit float TIFF.[/*]
  • Load into GIMP 2.12.[/*]
  • Increase saturation on Red channel (to improve Barnard's Loop), I claim artistic license on that.[/*]
  • Apply gentle 'S' curve.[/*]
  • Adjust black point.[/*]
Once I have the stack, the above processes take about 30 minutes.

I have data for 10s and 20s exposures and have included 3 results as a comparison - 60x10s, 60x20s, 60x10s+60x20s.  As you can see, the Belt stars start to become dominant.  I will have to work on this.

I am comparing my effort against this  which is using the same lens and a Canon 6D Mk2.

As for the age thing, I am rapidly approaching completion of my 70th orbit of the Sun ... LOL.  I have elected to 'keep calm and carry on'.

Dave

comparison.JPG
Attachments (1)
  • Page :
  • 1
There are no replies made for this post yet.
Be one of the first to reply to this post!
Submit Your Response
Upload files or images for this discussion by clicking on the upload button below.
Supported: gif,jpg,png,jpeg,GIF,JPG,PNG,JPEG
· Remove
  Upload Files (Maximum 20MB)

Follow Us

Newsletter

Proud to use

  • FLI

  • 656 Imaging

  • 10 Micron

  • Planewave

  • ZWO

Company Details:

Roboscopes

802 Kingsbury Road
Birmingham
B24 9PS
United Kingdom


Roboscopes is a trading name of ENS Optical LTD ¦ Copyright© 2020 Roboscopes